90行代码,由遥感影像制作遥感变化检测样本的教程
90行代码,由遥感影像制作遥感变化检测样本的教程
ytkz制作遥感变化检测样本,其他的遥感深度学习样本制作流程,在本质上无大的差别。
比如遥感语义分割的样本coco格式、voc格式,遥感目标检测yolo格式等。
它们的差别只在细节之处。现不展开细说,今天说的是:由遥感影像制作遥感变化检测样本
模仿
俗话说,巧妇难为无米之炊。
制作遥感变化检测样本前提是,拥有两张完成配准的遥感影像和一张标签影像。
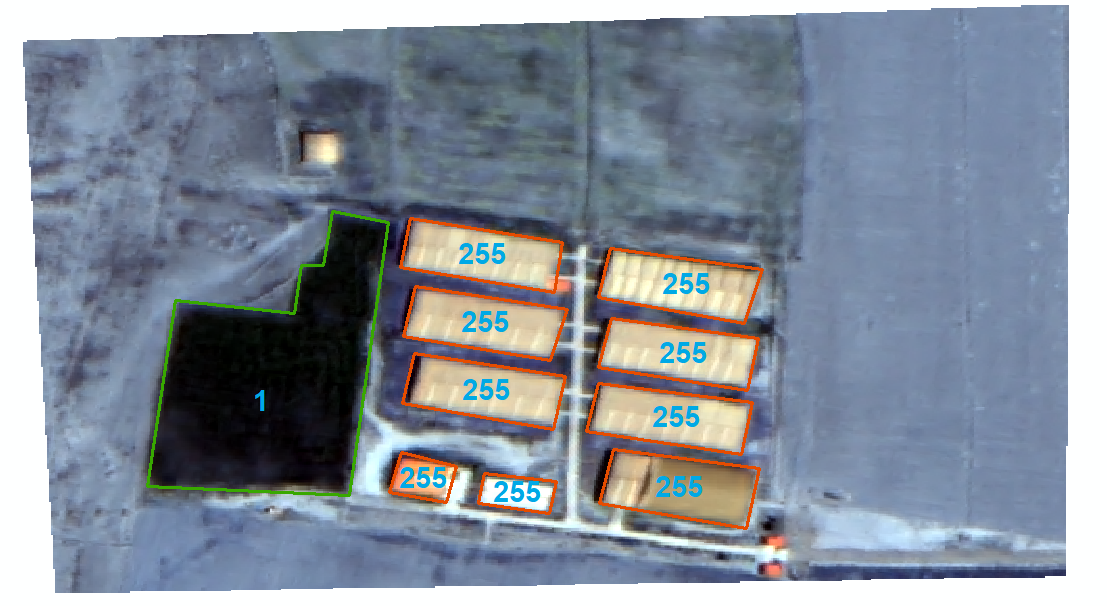
标签影像可以由矢量文件转换(这个教程最近会做)。
遥感变化检测样本的格式,我们可以参照已有的开源数据集:LEVIR、WHU-CD
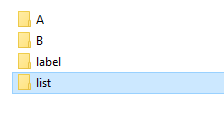
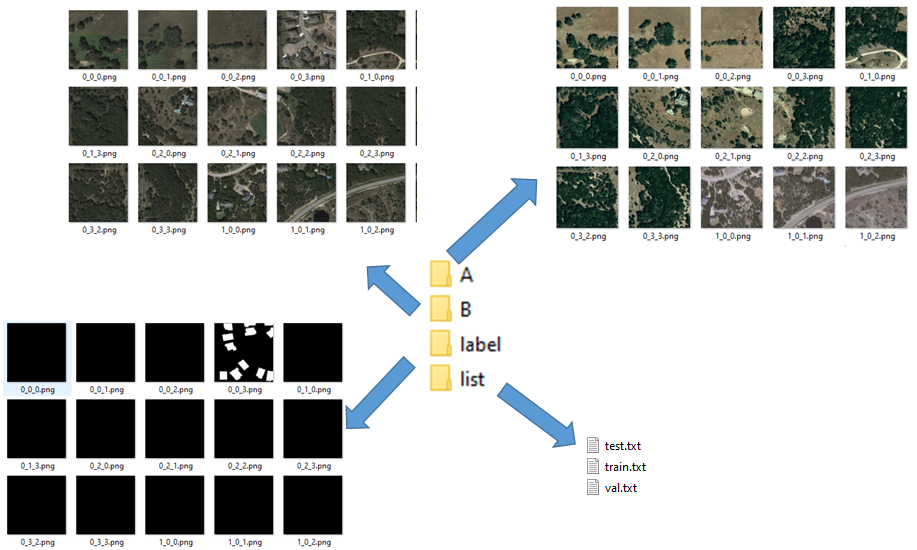
我们以LEVIR为例子,下面是LEVIR的数据集文件结构:
A文件夹存放后时相图片,
B文件夹存放前时相图片。
前后时相是相对的,例如A文件夹存放的照片拍照于2019年,B文件夹存放的照片拍照于2024年
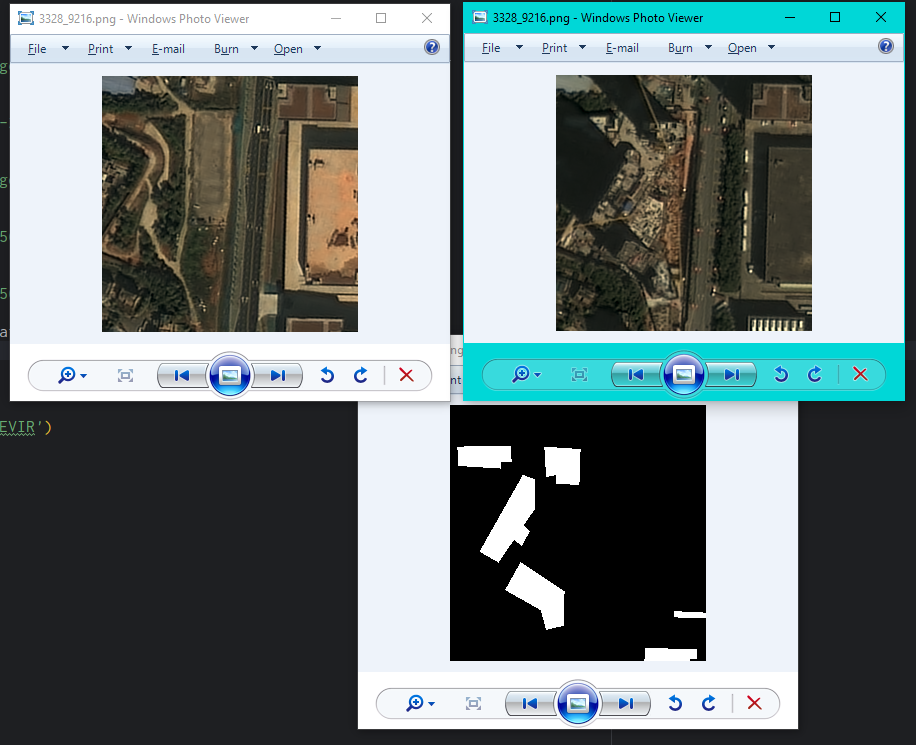
label文件夹存放前后时相变化的差值,有变化的地方用白色表示,无变化则用黑色表示。
白色表示,代表计算机中数值255。此时我们的标签文件是8bit。
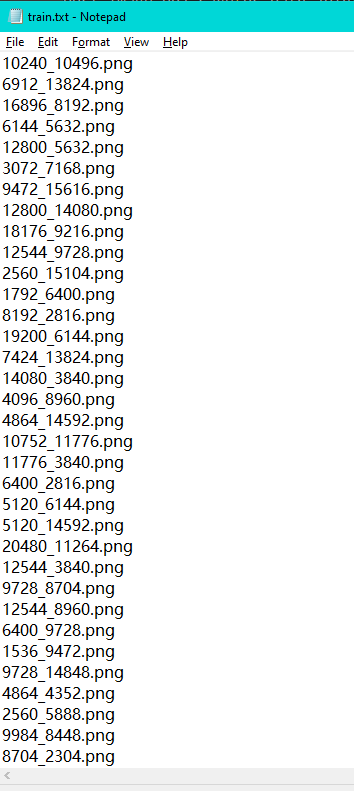
list文件夹则存放三个txt,分别代表训练集、验证集、测试集。下图是训练集部分的截图。
从图片尺寸大小上,看看LEVIR数据集是怎么定义的。
A、B文件夹中的图片大小为(256,256,3)
label文件夹中的标签图片大小为(256,256)
制作过程
在此之前,已经把两景影像进行了配准、降为8bit操作。
同时也把标签矢量处理为TIF格式。
所以,此时我们拥有三个尺寸相同的栅格TIF文件。
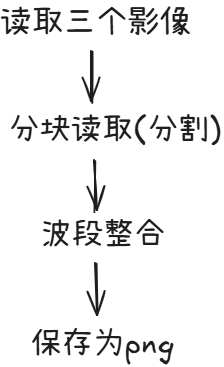
制作变化检测样本的整体流程如下:
一般来说,遥感影像尺寸非常大,所以分块读取操作也是分割图像的操作。
分块大小设置为256。
波段整合是为了将4波段的遥感影像,处理为3波段的真彩色图像,最后将其保存为png格式。
此时要注意的是,除了标签文件的尺寸为256x256外,其余两个文件尺寸为256x256x3。
下面是完整的python代码。
#!/usr/bin/env python
# -*- coding: utf-8 -*-
# @Time : 2024/12/1 22:49

'''
图片格式为  x,y,3
标签格式为  x,y
'''

from osgeo import gdal
import os
from PIL import Image
import numpy as np
from tqdm import tqdm
import math
def convert_band(array):
    # 交换1、3波段
    temp_array = array.copy()
    array[0, :, :] = array[2, :, :]
    array[2, :, :] = temp_array[0, :, :]
    return array

def split_images(pre_file, post_file, label_file, out_dir):
    out_image_dir1 = out_dir + '\\A'
    out_image_dir2 = out_dir + '\\B'
    out_label_dir3 = out_dir + '\\label'
    for dir in [out_image_dir1, out_image_dir2, out_label_dir3]:
            os.makedirs(dir, exist_ok=True)

    preds = gdal.Open(pre_file, gdal.GA_ReadOnly)
    postds = gdal.Open(post_file, gdal.GA_ReadOnly)
    labelds = gdal.Open(label_file, gdal.GA_ReadOnly)

    cols = preds.RasterXSize
    rows = preds.RasterYSize

    i = 0
    j = 0
    nBlockSize = 256

    # 进度条参数
    XBlockcount = math.ceil(cols / nBlockSize)
    YBlockcount = math.ceil(rows / nBlockSize)

    with tqdm(total=XBlockcount * YBlockcount, desc='遥感深度学习样本预处理分割') as pbar:
        while i < rows:
            while j < cols:
                # 保存分块大小
              nXBK = nBlockSize
              nYBK = nBlockSize

                # 最后不够分块的区域,跳过
              if i + nBlockSize > rows :
                  i += nBlockSize
                  j += nBlockSize

              elif j + nBlockSize > cols:
                    j += nBlockSize
                    pbar.update(1)
                    pass
              else:
                pre_image = preds.ReadAsArray(j, i, nXBK, nYBK)     # 读取数据
                post_image = postds.ReadAsArray(j, i, nXBK, nYBK)
                label_image = labelds.ReadAsArray(j, i, nXBK, nYBK)

                pre_image = pre_image[:3, :, :]      #  只取前三个波段
                post_image = post_image[:3, :, :]

                pre_image = convert_band(pre_image)
                post_image = convert_band(post_image)

                pre_image = np.transpose(pre_image, (1, 2, 0))      # 由(z,x,y)  转成 (x,y,z)
                post_image = np.transpose(post_image, (1, 2, 0))

                # new_label_image = np.zeros(shape=( nXBK, nYBK,3))     #  生成label图像  (x,y,z)
                # for k in range(3):
                #     new_label_image[ :, :,k] = label_image

                label_image = label_image.astype(np.uint8)        #  转成uint8格式
                pre_image_obj = Image.fromarray(pre_image)
                post_image_obj = Image.fromarray(post_image)
                label_image_obj = Image.fromarray(label_image)

                pre_image_obj.save(os.path.join(out_image_dir1, f'{i}_{j}.png'))      #  保存图像
                post_image_obj.save(os.path.join(out_image_dir2, f'{i}_{j}.png'))
                label_image_obj.save(os.path.join(out_label_dir3, f'{i}_{j}.png'))

                j += nBlockSize
                pbar.update(1)
            i += nBlockSize
            j = 0

    pbar.close()

if __name__ == '__main__':
    pre_file = r'F:\T1\2018_unit8.tif'
    post_file = r'F:\T2\2022_unit8.tif'
    label_file = r'F:\label\2022_label.tif'
    out_dir = r'F:\sample'
    split_images(pre_file, post_file, label_file, out_dir)
运行完上面的代码后,会在F:\sample生成三个文件夹。
也是上文提到的A、B、label文件夹。
接着我们需要对数据进行划分,制作list文件夹。
代码如下:
#!/usr/bin/env python
# -*- coding: utf-8 -*-
# @File : partition_dataset.py
'''
划分数据集
'''

import os, glob
import numpy as np
class partition_dataset:
    def __init__(self, input):
        self.list_path  = input+'\\list'
        os.makedirs(self.list_path, exist_ok=True)

    def partition(self) -> None:
        """
        划分数据集
        """
        img_lists = glob.glob(input+'\\A'+ '\\*.png')
        # 打乱顺序
        np.random.shuffle(img_lists)

        # 划分数据集
        train_list = img_lists[:int(len(img_lists)*0.7)]
        test_list = img_lists[int(len(img_lists)*0.7):int(len(img_lists)*0.8)]
        val_list= img_lists[int(len(img_lists)*0.8):]

        train_list = [os.path.basename(img) for img in train_list]
        test_list = [os.path.basename(img) for img in test_list]
        val_list = [os.path.basename(img) for img in val_list]
        with open(self.list_path+'\\train.txt', 'w') as f:
            f.write('\n'.join(train_list))

        with open(self.list_path+'\\test.txt', 'w') as f:
            f.write('\n'.join(test_list))

        with open(self.list_path+'\\val.txt', 'w') as f:
            f.write('\n'.join(val_list))

if __name__ == '__main__':
    input = r'F:\sample'
    partition_dataset(input).partition()
结果展示
至此,由遥感影像制作遥感变化检测样本的处理已全部完成。
